Monday, April 25, 2011

Non-destructive Drive Expansion in the StorCenter

If you can't tell from the series of posts I've already published, I'm having some fun playing with the iomega ix2-200 that I received from Chad Sakac of EMC. In reviewing those posts, I realized that I didn't publish anything on the trick to expanding the storage on the ix2 (which should also apply to all the models in the StorCenter series) without destroying your data.

This technique is fairly straightforward, and while it takes time and a bit of work at the command line via "Support mode", you will also be best served if all your data is still backed up. Note: to get at the support page on a "Cloud Edition" unit, the URL is /diagnostics.html

Preparation...

  1. Upgrade your drives with bigger models.
    1. It's not strictly required, but I suggest you upgrade starting at the highest labelled drive, working your way to the lowest labelled drive
    2. In order to make full use of each drive's capacity, they should all be identical.
    3. Shut down your unit each time you swap a drive (unless you're using a model that is explicitly hot-swappable).
    4. Allow the unit to fully redistribute the protected data before swapping the next spindle
  2. Enable SSH access to your unit.
    1. There's an unlinked page on the system called support.html; access it by putting the address directly into your browser's address bar.
      support.html
    2. Check Allow remote access for support (SSH and SFTP) and click Apply
  3. Use an SSH client to logon to your unit
    • username: root
    • default password: soho
    • If you have security enabled, you will need to append the primary administrator's password to the default password. For example, if your primary user's password is ducksauce, the SSH password is sohoducksauce.

Magic Time!

The devices can be expanded because of the storage subsystem being used in the Linux kernel. The process is straightforward: expand the "outer" container before expanding the inner container(s).
  1. Dismount the user storage volume:
    root@ix2-200d:/# umount -l /mnt/soho_storage
  2. Expand the RAID pseudo-device:
    root@ix2-200d:/# mdadm --grow /dev/md1 --size=max
  3. Expand the LVM physical volume:
    root@ix2-200d:/# pvresize /dev/md1
  4. Determine the free space in the LVM volume group:
    root@ix2-200d:/# vgdisplay
    --- Volume group ---
      VG Name               md1_vg
        .
        .
        .
      Free  PE / Size       476930 / 931.50 GB
        .
    
  5. Expand the LVM logical volume by the amount of free blocks:
    root@ix2-200d:/# lvextend -l +476930 /dev/md1_vg/md1vol1
  6. Mount the expanded volume:
    root@ix2-200d:/# mount -t xfs -o noatime /dev/mapper/md1_vg-md1vol1 /mnt/soho_storage
  7. Expand the xfs file system:
    root@ix2-200d:/# xfs_growfs /dev/md1_vg/md1vol1
  8. Reboot the system (so the web management tools will recognize the expansion):
    root@ix2-200d:/# telinit 6
Your device will reboot and (if you have email notifications correctly configured) it will notify you that "data protection is being reconstructed", a side effect of expanding the outermost RAID container.

Wednesday, April 20, 2011

iomega "cloud edition" updates hardware, too

I've got several of iomega's NAS boxes from their ix product line. I was looking over the specs on the current "cloud edition" models to see what new "awesomesauce" was baked into the new firmware (hence making it a "personal cloud" device) and noticed that the hardware also underwent some quiet revisions. The ix2 is still shipping with 2 spindles and 256MB RAM, but the CPU has been updated from the old 200MHz ARM to a much-improved (but unnamed) 1GHz processor. The other models were similarly updated, with the ix4 getting a 1.2GHz CPU and the stellar ix12 getting an Intel E8400 (3GHz dual-core).

In general, it means the -200 and -300 designations no longer indicate the CPU speed as it did with their predecessors, the non-cloud editions.

UPDATE 14-June-2011

I've discovered that I've been in error in asserting that the older models (i.e., "non cloud") were 200MHz ARM units. Like the new units, the old ones are based on the Marvell Kirkwood ARM-compatible system-on-chip parts, which run at 1 or 1.2 GHz. I don't have enough data on the innards of the ix12 (old vs new), but I'm completely wrong on the ix2 & ix4...

Saturday, April 16, 2011

ix2-200 FrankenDisk Comparison

Okay, so you're a bit of a whack-job gadget geek, you read my previous post about upgrading an iomega ix2-200 by replacing the stock drives with SSDs, and now you want to know what sort of benefits might be gained for such a stunt.

Look no further... Here are my results.

The first chart is meant to make it clear that the improvements in replacing the 5900RPM spinning disk with SSD is marginal compared with the performance of putting the SSDs into a system that can really take advantage of them. Yes, the improvement is there, but the small, 200MHz ARM processor with 256MB RAM in the ix2-200 has nothing on a 2GHz quad-core with 8GB (my home desktop). But if you're interested in this experiment, you already knew that: you want to see how the ix2 fared...


The 4K read/write tests are meant to benchmark the outer-envelope for typical filesystem use: your standard Windows desktop is using NTFS with 4K clusters, so all your I/O is based on these units, whether or not you're actually reading/writing something of a different size. By doing 100% random, any cache in the system is pretty much overwhelmed, giving the real distinction between the two drive types.


The big-chunk sequential reads and writes represent workload that reflects video streaming (sequential read) or backup (sequential writes). Like the 4K random tests, this sort of workload also gets little benefit from cache and reflects the real throughput of  the drives.

Naturally, the reads fared better than the writes, and it's interesting to see the distinctions between the unit's iSCSI versus CIFS performance. In summary, you can better-than-double the performance of the device through upgrading to SSD.

Turbocharge your ix2-200 with SSD

The iomega ix2-200 is a nice little device for home or small-business NAS use, but it really suffers in the performance department: it only has a pair of 5900 RPM SATA drives under the hood, not to mention a slow (200MHz) CPU a single-core 1GHz CPU and only 256MB RAM. It's key benefit is the small package, which in turn equates to nice portability for a shared-storage device. However, if you're willing to break your warranty and get your hands dirty with a screwdriver and SSH client, you can turn it into something of a speed demon with some aftermarket upgrades.

Disclaimer: I don't advocate doing this; it's a bad idea for several reasons: you will sacrifice a ton of capacity (and cash) to gain performance improvements in a device that is really too underpowered to truly take advantage of the upgrade.

That said: I am also a gadget and hardware guy. I love playing with this stuff—especially storage and networking—and this was too much of an opportunity to miss. I did this more as an experiment to prove that a) it could be done and b) to see what kind of improvements were the result.

The ix2-200 itself will set you back at least $200 to start with, and 128GB SSDs (as used in the example) will also set you back $200 each plus the $20 each for the drive converters. For most users, you could find a much better way to spend $650-700 on shared storage. But if you need really, really fast, shared storage in a small, portable package—and capacity isn't as important as speed—this little Frankenstein's monster may be just the ticket.

Here's what you need, and how to get it done...

Preparation...

  1. Get your hands on an iomega ix2-200. If you can find a used/broken model, so much the better; and because we're gutting the factory drives, pick up the lowest-capacity model (1TB raw in 2 x 500GB) you can get your hands on. It must be able to boot into the management console from at least one drive; I don't have an image that you can lay down on a new replacement drive, and I don't advocate going onto the Internet in the hope you can find one that is truly "clean".
  2. Get a pair of the biggest SSD that you can afford. Don't worry about getting a "peak performance" model: even the slowest MLC-type units will still out-perform spinning disk, and still have more throughput than the ix2's SATA bus can handle. A matched pair is best because you can then use RAID0 for maximum performance.
  3. Assuming that your SSDs will be the 2.5" form-factor, get a pair of Icy Dock 2.5"-to-3.5" HDD Converters from your favorite reseller; I bought mine from Newegg.
    Note: Icy Dock has recently released a Dual 2.5"-to-3.5" Converter with built-in RAID-aggregation capability that would potentially allow you to put four SSDs into the unit. Depending on the way the ix2 recognized the drives, you could do JBOD (so the ix2 would "see" all 4 drives and permit you to run RAID5 in the GUI software), RAID1 (and use manually-built RAID0 in the ix2) or RAID0 (and use GUI-built Mirroring). I haven't tried it, so your mileage may vary...
  4. Assemble your new drives: put the SSDs in their Icy Dock converters
  5. If you're using an ix2 that you already own, back up all your data currently on it. What you're doing is decidedly destructive, and you will end up with less capacity. You don't have to worry about the system partitions, just the user data.

Replace the original drives with your SSDs...

  1. Change the protection method to "none". The only way the ix2 will allow you to do this is to remove all your shares and/or iSCSI volumes, and the only way to do that is to delete all your data (aren't you glad you backed everything up?).
  2. Shut down the ix2. The device infrastructure wasn't meant to support hot-swap.
  3. Remove one drive from the device (I always start with HDD2, but the system is designed so you could replace either one). Replace it with an SSD (in its converter, if needed).
  4. Restart the ix2. When it finishes booting and you can see the management dashboard, the unit will have replicated the system partition (/dev/md0) to the new drive, and should notify you that it recognizes the drive substitution. By removing the protection in Step 1, there's no wait while the system replicates the data partition, and the available data (as shown in the dashboard) should be roughly equivalent to the sum of the two drive sizes.
  5. Navigate to Disk Management in the control panel and verify that both disks are recognized by the system. If the new drive isn't recognized—the system displays no drive for the disk position you replaced, or the size is incorrect—you should stop and verify that the new drive is "good" in a regular PC. Even if the drive works, it is possible that the SATA implementation used by the SSD is not compatible with the ix2 hardware.
  6. Shut down the ix2. Replace the other drive.
  7. Restart the ix2. When it finishes booting, the appliance will have again replicated the system partition for reliability, and the remaining space on the drive will have been added to the pool of available storage.
  8. Navigate to Disk Management and verify that both disks are recognized and that you have the full storage capacity you were expecting.
Assuming everything went correctly for you, your ix2 will show the storage capacity as a single, unprotected pool of space. What it doesn't tell you is that the drives are assembled into a "linear" array: only after the first drive gets full will the other drive be used. You now have three choices:
  1. Live with it.
    You gain lots of speed by having the SSDs in there, but until you "fill up" the first disk's user data partition, that second one is doing nothing for you (although it is protecting the boot partition). If this is your choice, you're done. Enjoy using your device.
  2. Switch the protection mode to "Mirrored".
    You use both drives equally, and if one "dies", the other one carries on because it has an exact copy of the data on the failed drive. There is a write penalty for this when compared to "no protection"—but it's definitely worth it if your only backup is tedious and annoying to restore—and reads should be slightly faster than a single drive, as the appliance can perform simultaneous I/O on the drives. The major downside, of course, is that the second expensive disk you put in the ix2 isn't "doing" anything but keeping your data safe. Personally, I only worry about this sort of thing for the boot/system/app partitions on these sort of appliance systems, and that's covered automatically for the ix2. If you choose this option, you can make the change through the device GUI, and when it's finished applying protection, you're done and can start using your device.
  3. Convert the storage type to RAID0.
    On the negative side, RAID0 doesn't give any data protection, but then neither does linear: in either case, if one of the elements dies, so does all your data. On the positive side, however, all I/O will be distributed—in parallel—between both drives; there's no write penalty; you still get 100% of the available space for storage (no loss for protection). Too many people trust RAID "data protection" features to safeguard their data without having good backups. When you intentionally use RAID0, you know you have to keep good backups, so you force yourself to do so before trusting your data to the device. If you decide to choose this path, continue on...

Friday, April 15, 2011

Booting an NTFS-formatted thumbdrive

There are times when you'd like to boot from a thumbdrive that is formatted for NTFS. You dutifully follow instructions for copying bootable code to the drive, but it refuses to boot. What's wrong?
Unless you set the boot sector to make the drive bootable, no amount of "diddling" the data on the drive will make a difference.

So: how do you get the boot sector set?

Check your workstation to see if you have a copy of "bootsect.exe" on your system. If you do, you're already set; if you don't, you'll need to grab a copy from your installation media.

Once you have it, format your thumbdrive with NTFS, then issue the following command on the drive letter for the thumbdrive:
bootsect /nt60 x:
where "x:" is the letter for the thumbdrive:


Add your custom files, and the thumbdrive should behave as you'd expect.

Thursday, April 14, 2011

Drive Performance

UPDATE: more data from other arrays & configurations
In an earlier post I said I was building a table of performance data from my experimentation with my new iomega ix2-200 as well as other drive configurations for comparison. In addition to the table that follows, I'm also including a spreadsheet with the results:
The Corners 1 block seq read

(IOPS)
4K random read

(IOPS)
4K random write

(IOPS)
512K seq write

MB/s
512K seq read

MB/s
Notes
local SSD RAID0 10400 2690 3391 63.9 350.6 2 x Kingston "SSD Now V-series" SNV425
ix2 SSD CIFS 3376 891 308 25.7 40.4 2 x Kingston "SSD Now V-series" SNV425
ix2 SSD iSCSI 4032 664 313 29.4 38.5 2 x Kingston "SSD Now V-series" SNV425
local 7200 RPM SATA RAID1 7242 167 357 94.3 98.1 2 x Western Digital WD1001FALS
ix4 7200RPM CIFS** 2283 133 138 32.5 39.4 4 x Hitachi H3D200-series;
**jumbo frames enabled
ix2 7200RPM CIFS 2362 125 98 9.81 9.2 2 x Hitachi H3D200-series
ix2 7200RPM iSCSI 2425 123 104 9.35 9.64 2 x Hitachi H3D200-series
ix4 7200RPM iSCSI** 4687 117 122 37.4 40.8 4 x Hitachi H3D200-series;
**jumbo frames enabled
ix4a stock CIFS 2705 112 113 24 27.8 4 x Seagate ST32000542AS
ix4 stock iSCSI 1768 109 96 34.5 41.7 4 x Seagate ST31000520AS
ix4a stock iSCSI* 408 107 89 24.2 27.2 4 x Seagate ST32000542AS;
*3 switch "hops" with no storage optimization introduce additional
latency
ix2 stock CIFS 2300 107 85 9.85 9.35 2 x Seagate ST31000542AS
ix2 stock iSCSI 2265 102 84 9.32 9.66 2 x Seagate ST31000542AS
ix4 stock CIFS 4407 81 81 32.1 37 4 x Seagate ST31000520AS
DROBO PRO (iSCSI) 1557 71 68 33.1 40.5 6 x Seagate ST31500341AS + 2 x Western Digital
WD1001FALS; jumbo frames
DROBO USB 790 63 50 11.2 15.8 2 x Seagate ST31000333AS + 2 x Western Digital WD3200JD
DS2413+ 7200RPM RAID1/0 iSCSI 12173 182 194 63.53 17.36 2 x Hitachi HDS722020ALA330 + 6 x HDS723020BLA642
DS2413+ 7200RPM RAID1/0 NFS 2 x Hitachi HDS722020ALA330 + 6 x HDS723020BLA642
DS2413+ SSD RAID5 iSCSI 19238 1187 434 69.79 123.97 4 x Crucial M4

PX6-300 1 block seq read

(IOPS)
4K random read

(IOPS)
4K random write

(IOPS)
512K seq write

MB/s
512K seq read

MB/s
Protocol RAID Disks
iSCSI none 1 16364 508 225 117.15 101.11
RAID1 2 17440 717 300 116.19 116.91
RAID1/0 4 17205 2210 629 115.27 107.75
6 17899 936 925 43.75 151.94
RAID5 3 17458 793 342 112.29 116.34
4 18133 776 498 45.49 149.27
5 17256 1501 400 115.15 116.12
6 18022 1941 106552.64149.1
RAID0 2 17498 1373 740 116.44 116.22
3 18191 1463 1382 50.01 151.83
4 18132 771 767 52.41 151.05
5 17692 897 837 56.01 114.35
6 18010 1078 1014 50.87 151.47
RAID66 17173 2563 870 114.06 116.37
Protocol RAID Disks 1 block seq read

(IOPS)
4K random read

(IOPS)
4K random write

(IOPS)
512K seq write

MB/s
512K seq read

MB/s
NFS none 1 16146 403 151 62.39 115.03
RAID1 2 15998 625 138 63.82 96.83
RAID1/0 4 15924 874 157 65.52 115.45
6 16161 4371 754 65.87 229.52
RAID5 3 16062 646 137 63.2 115.15
4 16173 3103 612 65.19 114.76
5 15718 1013 162 59.26 116.1
6 16161 1081 201 63.85 114.63
RAID0 2 15920 614 183 66.19 114.85
3 15823 757 244 64.98 114.6
4 16258 3769 1043 66.17 114.64
5 16083 4228 1054 66.06 114.91
6 16226 4793 1105 65.54 115.27
RAID66 15915 1069 157 64.33 114.94

About the data

After looking around the Internet for tools that can be used to benchmark drive performance, I settled on the venerable IOmeter. Anyone who has used it, however, knows that there is an almost infinite set of possibilities for configuring it for data collection. In originally researching storage benchmarks, I came across several posts that suggest IOmeter along with various sets of test parameters to run against your storage. Because I'm a big fan of VMware, and Chad Sakac of EMC is one of the respected names in the VMware ecosystem, I found his blog post to be a nice start when looking for IOmeter test parameters. His set is a good one, but requires some manual setup to get things going. Also in my research, I came across a company called Enterprise Strategy Group which not only does validation and research for hire, they've published their custom IOmeter workloads in an IOmeter "icf"configuration file. The data published above was collected using their workload against a 5GB iobw.tst buffer. While the table above represents "the corners" for the storage systems tested, I also captured the entire result set from the IOmeter runs and have published the spreadsheet for additional data if anyone is interested.

px6-300 Data Collection

The data in the px6-300 tables represents a bit of a shift in the methodology: the original data sets were collected using the Windows version of iometer, while the px6-300 data was collected using the VMware Labs ioAnalyzer 1.5 "Fling". Because it uses the virtual appliance, a little disclosure is due: the test unit is connected by a pair of LACP-active/active 1Gb/s links to a Cisco SG-300 switch. In turn, an ESXi 5.1 host is connected to the switch via 4x1Gb/s links, each of which has a vmkernel port bound to it. The stock ioAnalyzer's test disk (SCSI0:1) has been increased in size to 2GB and is using an eager-zeroed thick VMDK (for iSCSI). The test unit has all unnecessary protocols disabled and is on a storage VLAN shared by other storage systems in my lab network. The unit is otherwise idle of any workloads (including the mdadm synchronization that takes place when configuring different RAID levels for disks, a very time-consuming process); there may be other workloads on the ESXi host, but DRS is enabled for the host's cluster, and if CPU availability were ever an issue in an I/O test (it isn't), other workloads would be migrated away from the host to provide additional resource.

The Takeaway

As expected, the SSD-based systems were by-far the best-performing on a single-spindle basis. However, as one might expect, an aggregate of spindles can provide synergy that meets or exceeds the capability of SSD, and locally-attached storage can also make up the difference in I/O performance. The trade-off, of course, is the cost (both up-front and long-term) versus footprint.

Wednesday, April 13, 2011

iomega StorCenter drive swaps

In my previous post about the iomega ix2, I wasn't sure that resizing the storage could be done without shell access by using GUI commands. I've now played with it enough to know that a) you can, but it is a destructive operation and b) the same technique can be used to shrink the available storage instead of grow it.

First, the technique:
  1. Swap in your new drive.
  2. Let it rebuild.
  3. Swap in the second drive.
  4. Before it gets done rebuilding, use the "delete disk" option:

    You'll have to jump through a bunch of hoops to make this happen, least of which is deleting all the data and shares (like I said, it's a destructive technique!), but once it's going, you might not get any indication that it's actually "doing" anything.
  5. Restart the unit
When it starts, if you have email alerts configured, you'll get a message that it's rebuilding the storage. Log back into the GUI and check your Dashboard; it should now show the new, increased capacity.

So why would anyone ever want to go smaller with one of these units? Well, suppose you had a pair of SSD drives that you picked up for cheap from Woot! or some other retailer. And suppose you picked up a pair of Icy Dock 2.5"-to-3.5" HDD Converters so that they'd fit correctly in the drive frame for the ix2? Well, you would then have the opportunity to create a smoking fast NAS with those SSDs.

I don't know enough about the StorCenter's Linux kernel (or Linux kernels in general) to tell if the unit can or does use TRIM to keep the write speeds optimal. But let's be fair: even without it an SSD blows away spinning disk at any speed. Given the cost/capacity ratio of SSDs, however, you'd have to be pretty starved for performance to try such a thing—and would certainly be better served by putting SSDs in a higher performance box than an ix2-200!

Sunday, April 10, 2011

iomega ix2-200 quick look

I received an iomega ix2-200 as a "spiff" from EMC, courtesy of Chad Sakac (thanks, Chad!), because I participated in some VMware environment storage performance metric collection.

The unit I received is the 2TB version, meaning that it had a pair of 1TB, 5900 RPM SATA-2 disks (Seagate ST31000520AS, to be exact). You can find reviews of this unit (and its drives) all over the Internet, both singing its praises as well as trashing iomega, EMC and anyone considered foolish enough to entrust data to the device.

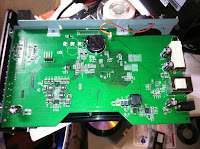
In a nutshell, the unit is a 200MHz 1GHz ARM926eJ-S-compatible Linux appliance based on the Marvell Kirkwood MV88F6281. The ix2 has 256MB RAM, one Gigabit ethernet port and three USB ports in addition to the two drives.


It takes advantage of LVM for its flexibility in storage management and data protection. The Linux heritage also gives it a long list of integrated, optional features that make it very interesting to someone that otherwise has no fileserver at home, but unless you're ready to get your hands dirty, it isn't expandable as an application platform. The device exposes its functionality through a very user-friendly web interface, and has four front-panel lights to communicate system status to the user/operator.


Personally, I thought it might be a clever way to store disk images in a shared, network-accessible location without using expensive SAN storage. We currently do it all the time on a regular workstation with a gigantic drive, and I thought this would give us a smaller footprint than a full-size PC. Further, I thought the ~1TB usable storage could be augmented with a Drobo connected via USB as add-on capacity without increasing the physical footprint.

This use case more-or-less failed miserably. Although I knew a mirrored-pair of SATA drives wouldn't have much throughput, I didn't "do the math" ahead of time to see just how bad it would be to save an image. My test platform was pretty basic: I attached a 320GB SATA disk to a USB adapter and began writing the image to a CIFS share. The image was larger than usual because it was a disk I wanted to archive after being in production, not a template image for other production disks.

I gave up on the image when it was 1h into it and was going to take another (estimated) 7h.

Truth is, I didn't expect much out of it given that it's basically a single, slow SATA disk: in mirrored mode, you might get some improvement in reads, but your writes will be penalized a little for the mirror set to stay in sync. The fact that I didn't pay for the thing made the discovery pretty painless.

The second part of the plan was also thwarted: the first-gen Drobo that I plugged into the unit wouldn't show up as attached storage. The Drobo works fine on my Windows 7 desktop, and other types of USB storage worked fine on the ix2. Nope, these two guys just aren't compatible.

So now I'm playing: I picked up a pair of 2TB, 7200RPM SATA-3 drives on sale (Hitachi H3D20006472S), and have proven to myself that it's possible to a) upgrade to faster disk and b) expand the capacity on the ix2. There's no secret to getting a faster disk installed: replace the two disks one-at-a-time (with a disk of same-or-larger capacity) and let the Linux mdadm subsystem resynchronize the data from the remaining disk. Increasing the capacity is a bit more technical, requiring console access (for non-destructive resize); I've not tried it, but it may be possible to resize using a factory reset, but I didn't try it myself. I do know, however, that SSH access and basic understanding of LVM makes storage modification a cakewalk. I've even contemplated resizing the user storage volume down to a bare-minimum in order to replace the disks with SSDs. The capacity is miniscule compared to spinning-disk, but the experiment to see how fast it could be is kind of compelling...

At any rate: I'm in the process of building a table of performance data from iometer, and I'm including not just the stock drives, but the upgraded pair, my 1st-gen Drobo and my Drobo Pro. I'm also going to include the results from a pair of 128GB Kingston SSDs in a stripe set (RAID 0) from my desktop machine as a "best-case scenario" for comparison.

And finally, one might think that my experience with the ix2 would have soured me on the whole line of products. It hasn't. I also have a 4TB (raw) ix4-200d that I picked up for cheap on eBay which I've proven to myself makes a stellar backup target for VMware environments using NFS. I will add the performance metrics from that unit to my results, as well as the results I get when I finish upgrading its disks from 4x1TB 5900RPM units to 4x2TB 7200RPM units. I am predicting that I will be much happier with the performance of the upgraded ix4 than the performance I'm currently getting out of the Drobo Pro.

Stay tuned!